Connect Snowflake with Alteryx
Alteryx + Snowflake = Awesomeness
Getting your PC ready
I promise this will be the last admin step needed to achieve unlimited data superpowers. It is annoying I admit, but a small step compared to what you will achieve. The snowflake drivers do not come standard with windows machines so they have to be downloaded and installed. Note this process as to be repeated on all machines that will connect to snowflake (including server if you are lucky enough to have alteryx server)
The link is below (for a windows 64 bit machine). If you are using a 32-bit machine, please read the advisory on the main page and start a gofundme account to try and score a new laptop before attempting to continue. If you are using linux then I am certain you are not reading this step-by-step guide. If you are using a mac, you can afford to pay someone to do this for you and cant use Alteryx anyway (which I understand is a heated debate but best taken up elsewhere)
https://sfc-repo.snowflakecomputing.com/odbc/win64/latest/index.html
Making the connection
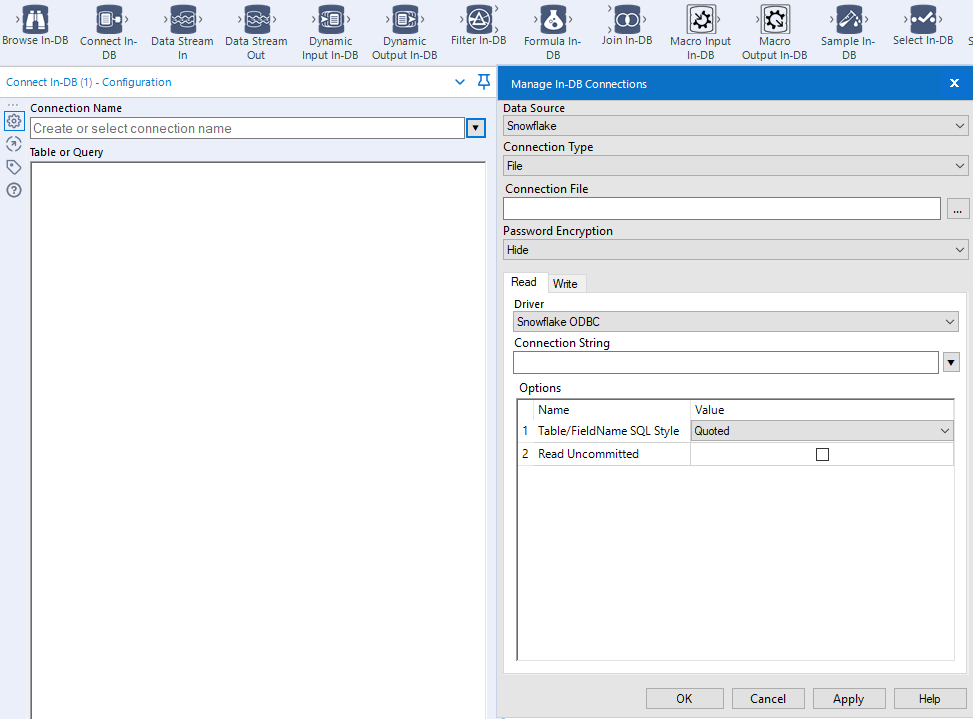
You can connect Alteryx to databases using both the regular input tool or the in database tool. For simplicity, I am focusing on the in-DB tools. The reality is the in-DB can easily perform the functions of the regular tool plus much more, so I recommend using them always when connecting to databases. Under in-database, click through to connect In-DB. Under datasource, you should see Snowflake as an option (if not review the first step).
File or User connection?
Decision time. Windows (and therefore Alteryx) allows for 2 types of ODBC connections, one is user based (where the setup is stored with the user of the machine) and the other is file based (where the credentials are stored in a file that can be shared). Personally, I like the file option because it's easily transportable (to a server for instance) or to share with a fellow analyst. However, this may give your security team the total creeps, so admittedly, the more secure way is a user based connection. Either way, choose your option. If you choose the file based method, you will need to specify a folder where the connection details will go.
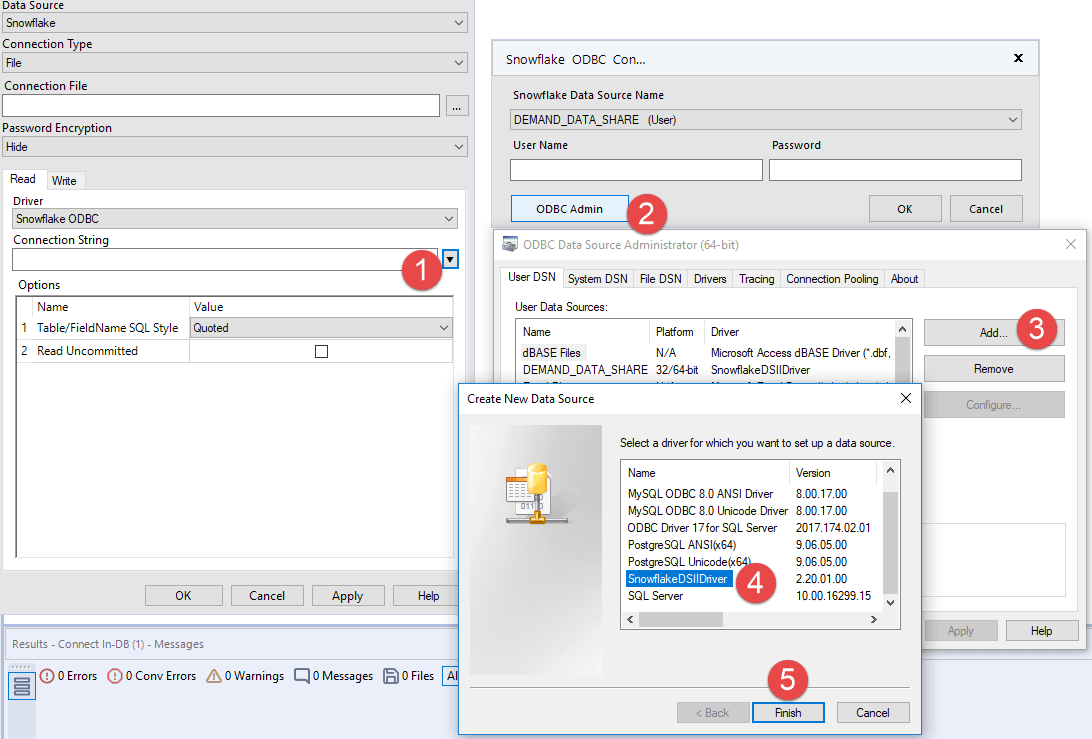
This being Windows there are...well..a lot of windows. You will need to create your machine based connection to Snowflake first.
From here you need to enter in your parameters. There are a few gotchas here to understand.
1) Datasource - this is the name of the datasource (eg. SNOWFLAKE_CENSUS)
2) User/password - for your Snowflake account
3) Server - this is your Snowflake URL - WITHOUT the https://
4) Database, Schema - these are the DEFAULT locations when you sign-in. These can be changed but if not explicitly changed in a workflow will default here.
5) Warehouse - this is the compute resource this connection will use. This can't be changed (easily anyway) so I highly recommend you use a warehouse that is always on extra-small. If someone increases its size and you are happily blasting away with Alteryx you can get some bill surprises.
6) Role. This also can't easily be changed. I strongly suggest you don't use accountadmin for this unless this is your own personal playground-then you own the toys play with them as you wish :)
7) Tracing. This can be blank but I recommend 4 (minimal logging).
8) Authenticator/Proxy/No-Proxy - Leave this all blank. If you are using multi-factor and/or proxy servers lets hope you are not following this step by step guide. (If you are then email us and we can certainly help with setting this up).
Now, you will be asked to configure a write driver. THIS IS IMPORTANT. WAKE UP NOW!
If you plan on writing little or no data to Snowflake from Alteryx, then select same as read driver here. When I say little I typically mean 1000 rows at a time or less. This is because standard ODBC drivers insert into databases one row at a time. This is super inefficient even for Snowflake. If you do same as read driver and later decide you want to write 1,000,000 rows into snowflake with Alteryx you are
a) GOING TO BURN LOADS AND LOADS OF CASH
b) GOING TO THINK SNOWFLAKE IS HORRIBLE AND REGRET READING THIS BLOG
c) WILL GO BACK TO EXCEL AND LOSE ALL HOPE OF A CAREER IN DATA
If you do want to load lots of data into Snowflake fear not and use the bulk loading option. At the time of this writing, bulk loading requires an s3 bucket and account. However, there are alternative options in late stage beta and Demand Data has specifically built loaders for Azure and GCP (contact us for interest). Setting up the s3 loader in self-explanatory but a little tricky. If you get stuck, contact us and we can help.
**TECHNICAL ASIDE**** Read if you care. The bulk loader works by zipping your data into chunks and compressing it and uploading it into a temporary storage and then triggering Snowflake to read this data directly into the engine. It is amazingly efficient How efficient? We can load from Alteryx 1,000,000 rows (1GB) in under 2 minutes. Using the standard loader, this would take 24 hours or more.
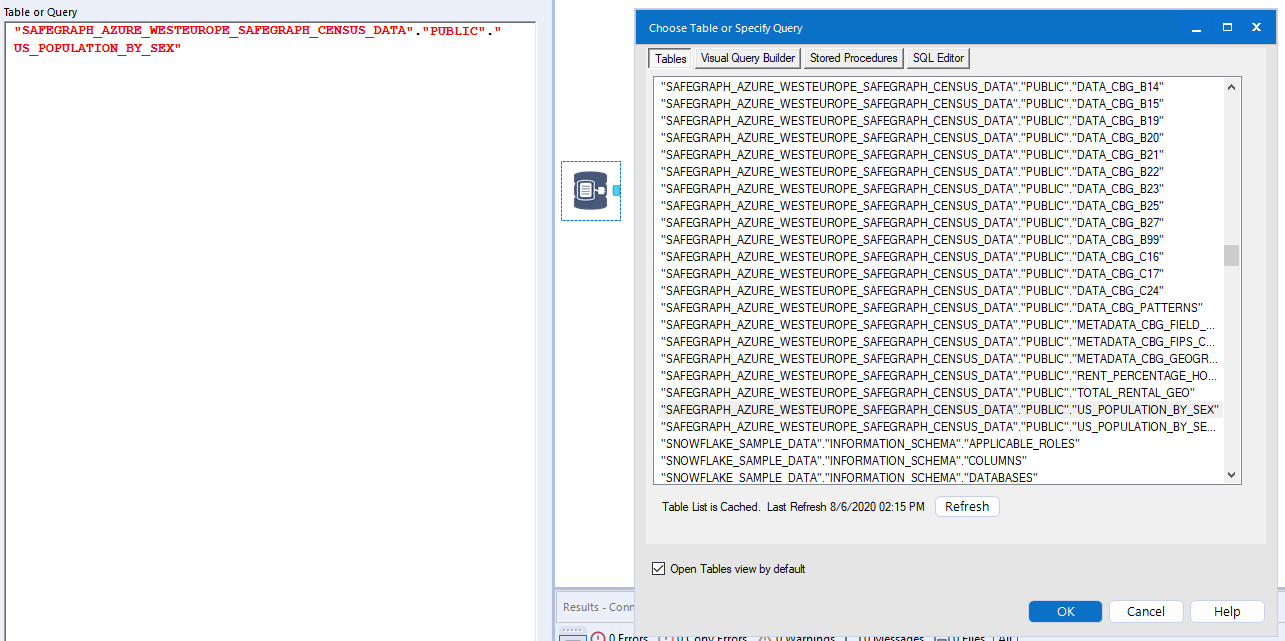
PHEW - Now you are done with that. You should be able to pull up a list of tables and connect to one using standard SQL or the visual query builder.


